Jute Wrapped Bottles and Cans


I have been working on these for a few Saturday's now. They were fun and easy to do. What a great way to reuse those used cans and bottles you have laying around. I started by hot gluing the jute to the bottle to get it started. Then I used elmers glue and coated the bottle a bit at a time and just started wrapping the jute around and around the bottle. It takes quite a little jute per bottle but I think totally worth it.
Use them as vases, makeup brush holder, pencil holder. Just to name a few.


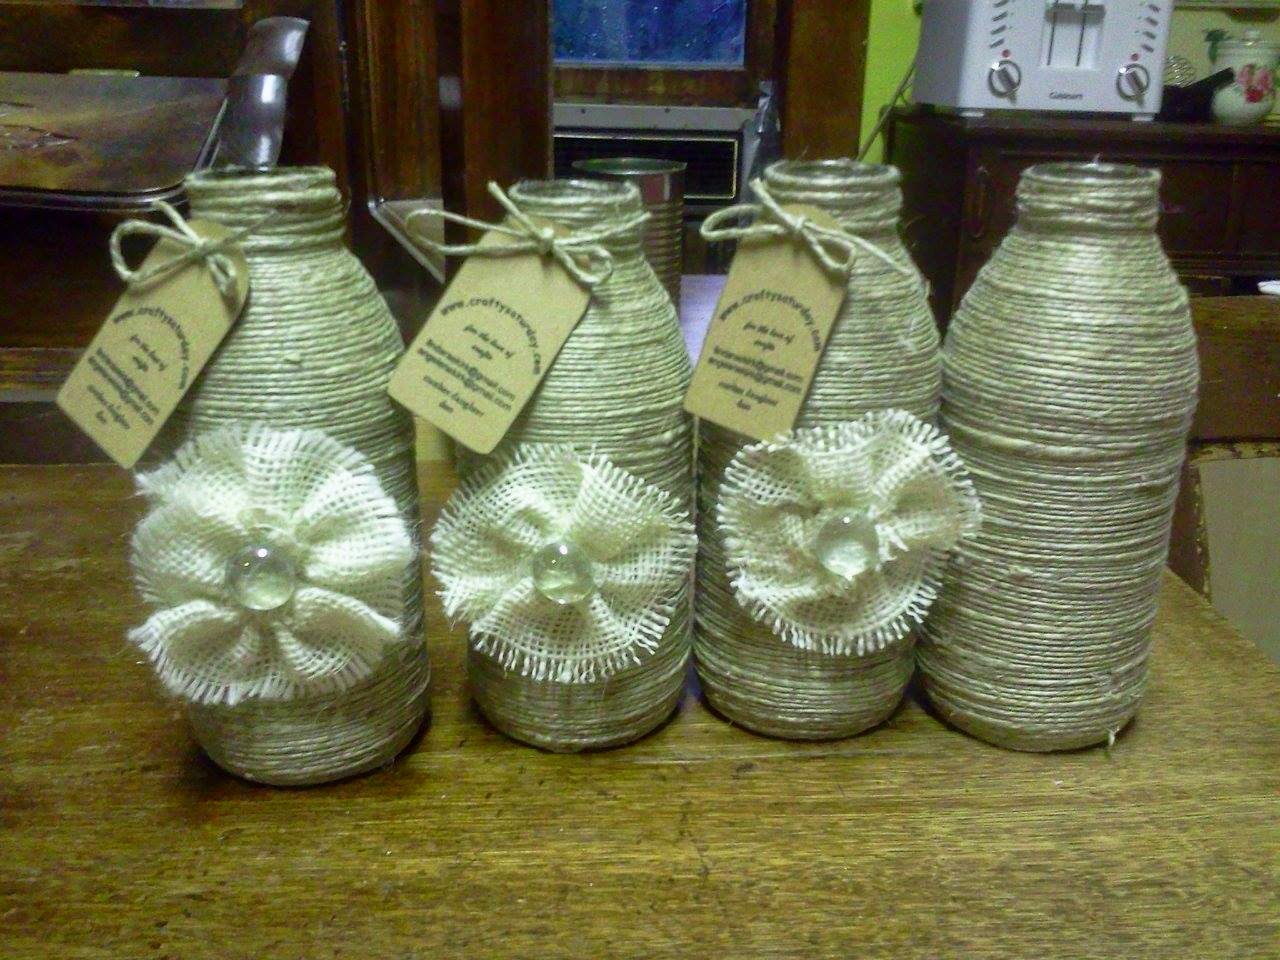
These little jute flowers are a no sew flower.
Cut a strip of burlap about 2.5" wide and 12-14" long.
Hot glue one of the short ends over itself, as if you are making a hem.
At the other short end grab one of the strings and pull, this will start to gather the piece together.
When you have it gathered pretty tight it will naturally make the shape of a flower. Hot glue the ends.
I put a little gem in the middle to finish it.


My little coffee filter flowers are made by cutting a dyed coffee filter like I did in the photo below.
Then I started folding the strip accordian style and made a flower shape. I finished them off with some buttons I had from my mother. 


All in all I am quite happy with how they all turned out.
Oh and the little tags hanging on them are for when Angie and I go to the Woodbine Applefest. We are getting pretty excited for that. the Applefest is held on the last Saturday in Sept. Should be a lot of fun.
 We decided with all the Crafty Saturday projects we have been doing why not take them on the road. So if you like what we are doing come visit us at the Applefest and if you like, purchase something or just come say HI!
Oh Crafty Saturday how I love thee!!

The Rose


Can you believe it! These roses were made from plastic spoons! 
Yep that's right plastic spoons.

I made the one on the right a couple weeks ago and Victoria and I made the other two today.
Since Angie was off visiting friends I got my other daughter to join in Crafty Saturday.
She is quite talented as you can see by the red one she made. We used white spoons for hers and then spray painted it red and left a little white.

materials needed are:
plastic spoons ( we used 12 for each rose)
tea light 
a wood skewer ( for the stem)
felt for the leaves
hot glue gun


  1. First paint the wood skewer green
  2. Next light your tea light
  3. Take a spoon and holding it upside down over the fire, let the plastic get hot so you can mold the bud. Be careful not to get burned due to the plastic getting hot.
  4. Heat the spoon at the point where it curves and then snip with some snips. You have just made your first petal.
  5. With the remaining spoons hold the spoon upright and heat it until you can bend the end of the spoon back slightly. you can also squeeze the spoon a little to make it slightly more curved. 
  6. Snip these petals like you did on the first one.
  7. Ready to assemble the rose now.
  8. Attach the rose bud to the wood skewer with a dab of hot glue and hold in place til it hardens. (be careful not to get burned by the glue) 
  9. Now start gluing the rest of the petals until you have the desired size rose.
  10. With your green felt make some leaves to attach at the bottom of the rose. (This helps hide the glue and also puts the finishing touch on your rose.)


And there you have it! They are truly a beautiful site. They really look real. And no two are going to be the same, just as in nature.
I am so glad Victoria did Crafty Saturday with me it was a lot of fun. She will be heading back to college in a week so it was great to spend the day with her. She also did some really great paintings on a few bottles which we will be posting in a few days so stay tuned.
And we also made some neat can lid magnets to. We really had a productive Crafty Saturday!

THANKS VICTORIA!