OLD WINE BOTTLES...NEW USE


These citronella bottles were fun to make and super easy.
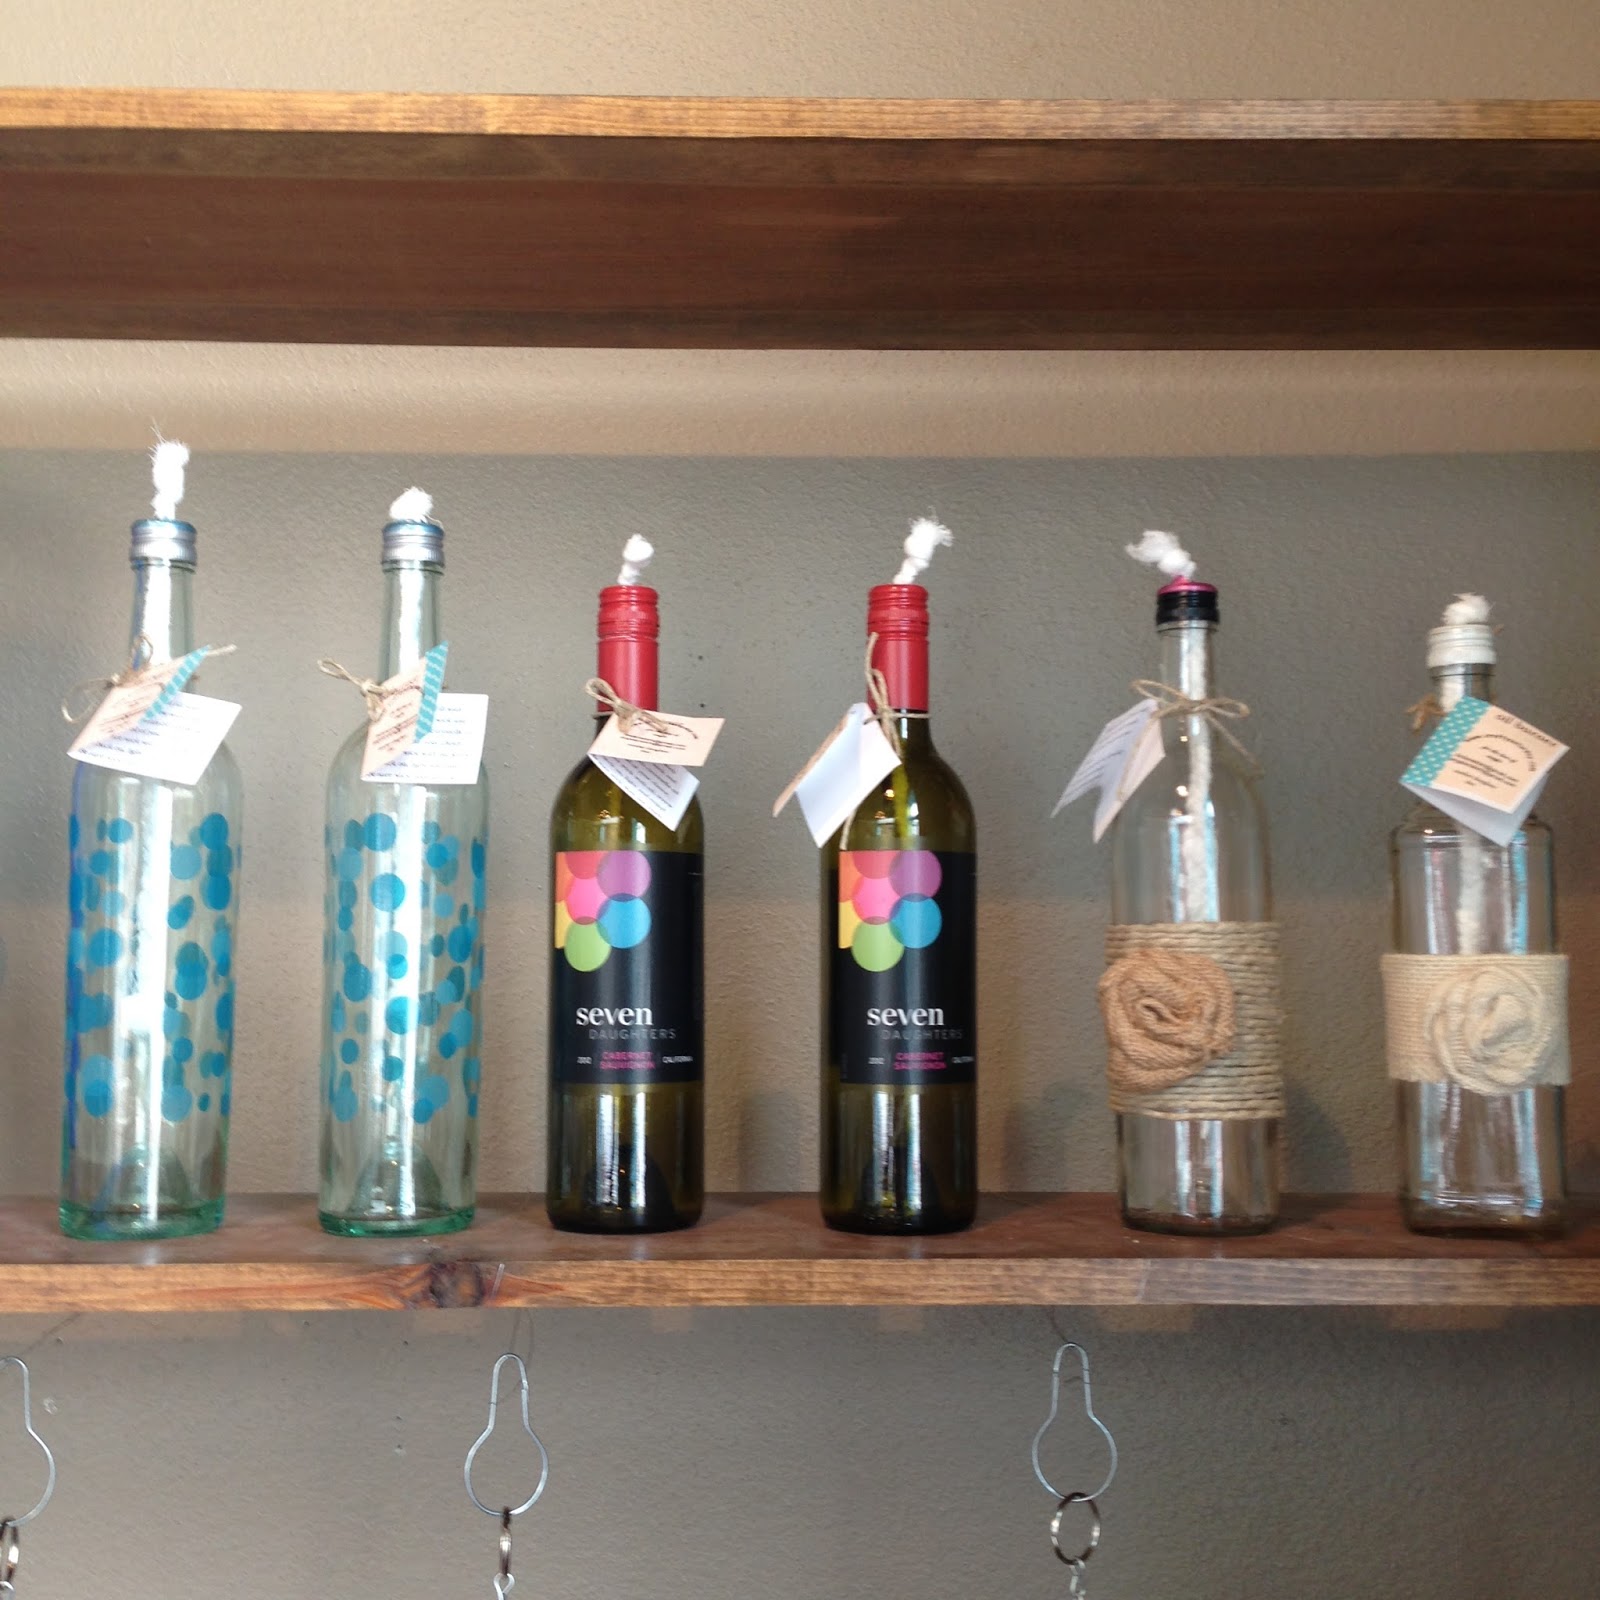
Pick some pretty bottles (and I have alot) embellish them if you like on the outside. 
The first 4 needed no embellishment, but the last two I used jute string and glued around 3 to 4 inches in the middle of the bottle.
 I purchased some cotton gauze from the Vet Clinic I work at and cut 3 pieces, then I braided them. I knotted both ends. You can also buy premade wick for citronella burners if you want.

I like using the screw lid bottles because then I don't have to buy any parts for the top of bottle to hold wick. I cut an 'X' in the top of the screw top and peeled back the 4 little triangles.


Then I take my wick I just made and push it through the top.


 All you have to do now is screw the lid on and you are finished.


The wicks I made do not go to the bottom of the bottle. They are a few inches from bottom so I can fill it with water up to just below wick and then I fill the rest up with citronella. 

Before you light your wick make sure to saturate the top of wick with citronella to make wick last longer.


Something else you can do to keep from using a whole wine bottle of citronella and give it a little more stability is put some of those little glass discs in the bottom. They seem to give the bottle more weight on the bottom.

Now you can sit back and admire your new burner while keeping those pesky mosquitoes away.


White Barns show Spring 2017

Well we had our show at the White Barns June 2-3. It was a success. We even camped out in my suburban one night. It was great when the show was done for the day we kicked back and enjoyed the evening with a couple drinks to relax and visit about the day.


I think our display was very nice and people friendly. Not to mention the barn was beautiful. It was a little warm at times. 
Angie had her stamping stuff set up so she could stamp bracelets right there. People would order them and tell her what they wanted on them and she would proceed to stamp away. Some stayed to watch her create their bracelet others left for 30 minutes or so and come back to a finished bracelet. It was something we had not done before and I think it worked out quite nicely.

I had been working on wood pallet signs and and so this was our setup for them. I also made what we called "Jar on wood" They were a nice hit. They are the jars you see hanging there with flowers in them. One woman bought one and said she was going to put it in her bathroom to put toothbrushes in.
The box in the center of the pic is Angies' stamping box filled with all her stamping stuff. We had several people ask us if it was for sale. It was a perfect eye catcher, I guess you could say intriguing to some. And while she was stamping we had people come up and watch her.