First official Crafty Saturday get together coming up Weekend of the 5th


Yes Rose, 
this is your wine bottle. I am bringing it so you can finish it. Holes are already drilled. 


Just a few things I am bringing for our Crafty Saturday Get to gether. Should be a great time spent with family and friends.

Wine Bottle Vase


Just a little something I decided to do while watching March madness. I love college hoops!
I have all these wine bottles and decided to pick out some pretty scrap book paper and modpodge it to the bottle for a nice vase.
Nothing to hard just cut my scrap book paper and used my mod podge  to glue it to the bottle and then used some string I had to give it a little depth and added zing.
And there it is. Pretty simple and quick.


Lace Trimmed Vanity Containers


My project this week is super simple and fast to complete. 
I love reusing cans and here is another project using cans.


1. Paint your cans any color you desire. I chose tan because I knew I was going to use black lace and I thought the two colors looked elegant together.
2.I used my trusty modpodge again and coated the cans. I used the gloss finish.
3.Cut lace to fit around can and hot glue in place. I also added the flowers on the front to give them a more glamorous look.
I think these would look really nice on a young girls vanity with make up brushes.


.....And there you have it. Oh Craft Saturday how I love thee!

Spring Wreath

SPRING IS IN THE AIR!!
I love making wreaths, they make for a great gift or a nice decoration to switch out each season!
This Saturday I decided to make a spring wreath because we all want spring to be here! We have had a sneak peak of spring weather this past week, so I thought it would be fitting. As I was making this wreath it started to snow, yes that's right, SNOWING in the middle of March! That didn't stop me from completing my spring time wreath!
What you'll need: Straw wreath, yarn, glue gun, felt, glass beads and scissors.
 (the party bird is optional)

Step one: wrap the entire wreath with the yarn.
Step two: begin to make the felt flowers and hot glue them where you think looks best.
Step three:Attach the party bird (optional)
Step four: hang it up!


The felt flowers
I'll show a quick guide to make the felt flowers, I took pictures of each step I took to make them. (I made three different types of the felt flowers, I only have picture tutorials for 2)

How to make little rose bud felt flowers
(sorry for the color change haha)
Sunburst felt flower
(again, sorry for the color change)
PARTY BIRD! (optional)

Happy crafting!!

Wine Bottle Vase and Wine Bottle Windchime or Votive holder


Ok I love wine and wine bottle crafts! So this week I did both, well I usually have a glass or two of wine while I craft, its relaxing.

 I really like repurposing things and I have a couple really cute ideas. The one on the left, my vase. The one on the right my soon to be wind chime or votive holder.


The first one I did was a wine bottle turned vase. Super simple and fun to do.
I cut tissue paper into small pieces and then with my trusty modpodge started glueing the pieces on the bottle.


I found it easier to work in small blocks on the bottle by painting modpodge on then sticking the tissue pieces on very randomly.
When the bottle was completely covered I used glossy modpodge and painted over the entire bottle, let it dry and do another coat.


And there you have it, a nice new vase for the flowers from your garden which I can't wait for because I am so over this thing called winter. But until then I will put a few of those coffee filter flowers from a previous post, (have I said how much I like the coffee filter flowers) in it so I can enjoy my new vase.

My other project, a wine bottle windchime or votive candleholder was done the same way with the tissue paper. The only difference was is that I used my bottle cutter and cut the bottom of the bottle off.

The votive holder- I used a common kitchen utensil, a whisk, to go up through the bottle and put a votive candle in it. Super cute and easy.


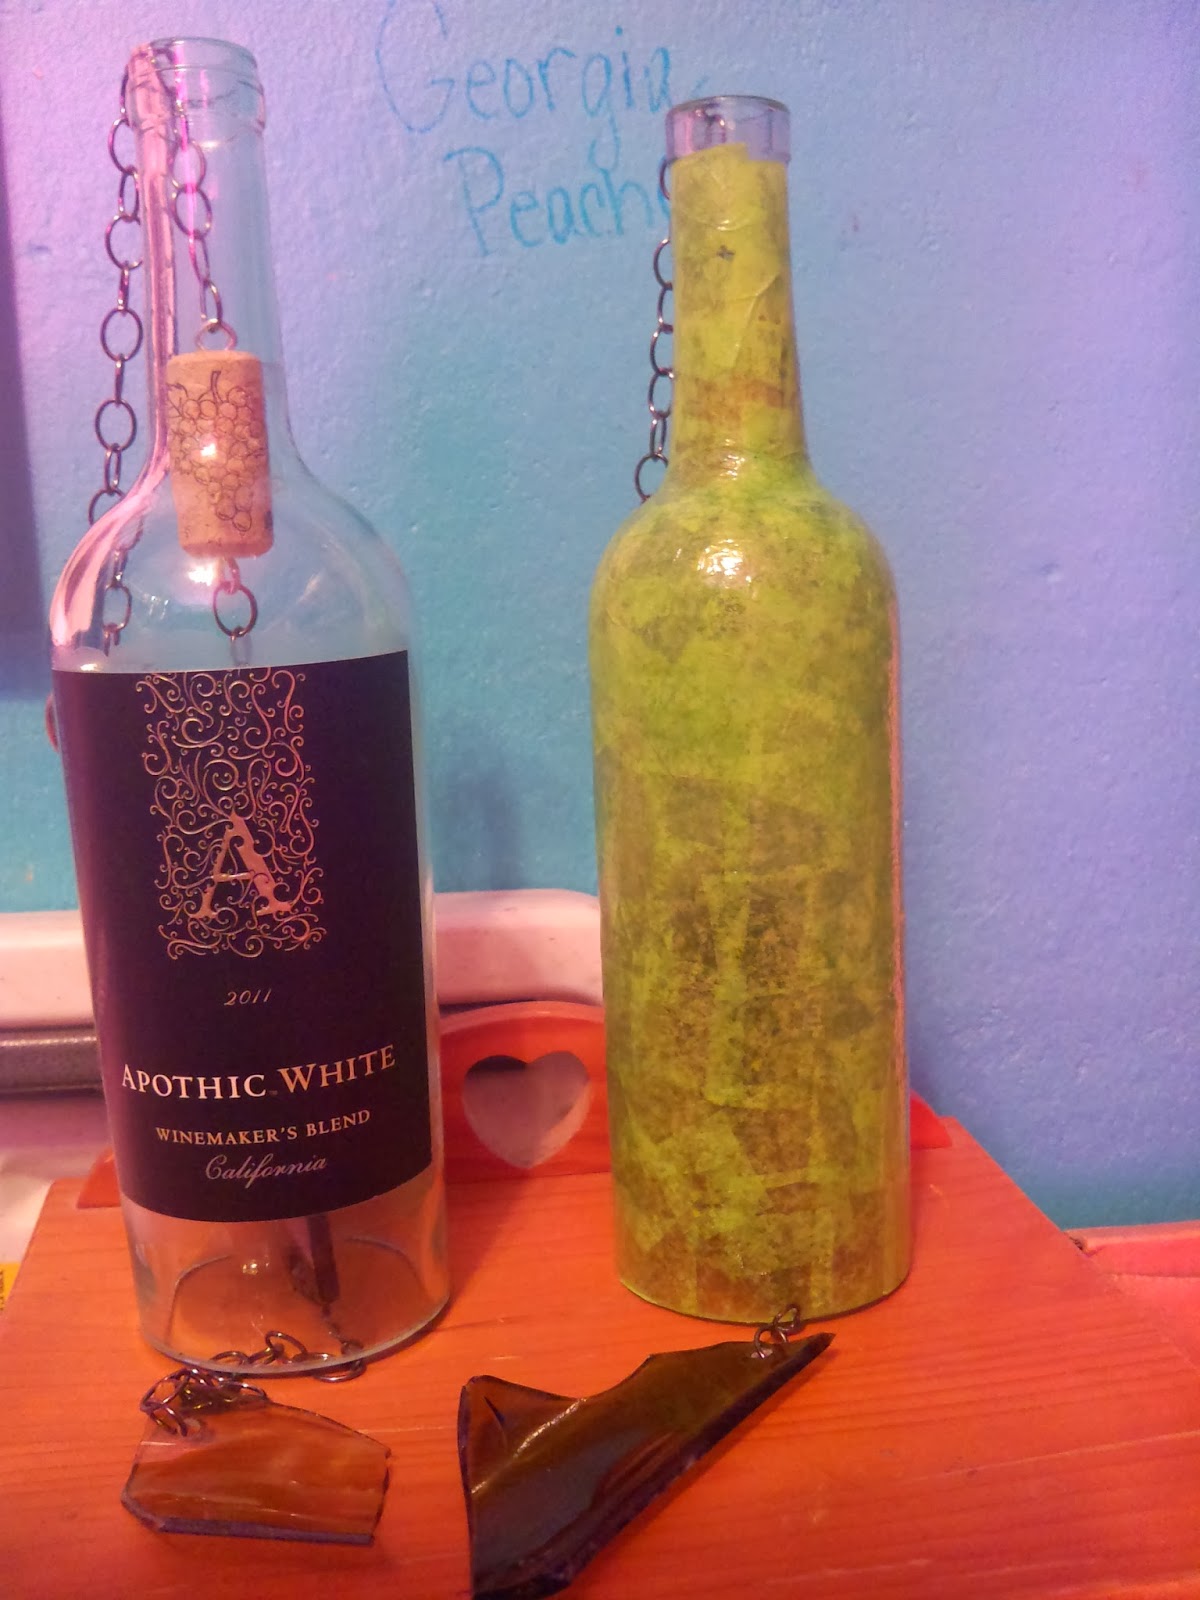
The windchime- a little more challenging.
You will need a wine cork, two lengths of chain, a clanger (as I call it),to make the chime and a piece to hang on the bottom to catch the wind.


What I used here was quite interesting. When I cut bottles not all cut straight, I call it being amateur. Anyway I took those bad bottles and turned them into something useful. I put the bottles in a bag and broke them into small pieces. Found the pieces I wanted to use and drilled holes in them with a diamond drill bit.
Assembly was easy...chain, eye screw, wine cork, another eye screw, more chain, my broken piece of glass, another bit of chain, and finally another broken piece of glass.


Wooden Car


This Craft Saturday project was not done by me...

While I was working on my project my boyfriend Alex decided it looked fun and joined in on the fun of Craft Saturday! He chose to paint a car for his nephew Miles. :)

This project was pretty easy, he bought a small wooden car from Wal-Mart ($1) and some acrylic paint. Painted a few coats of orange paint for the base, then painted the windows black. Alex wanted to get fancy so he added a "M" on the hood. He used a stencil I had to paint the M on.

I think it looks awesome! I'm sure Miles will love it!

Anyone can do crafts!


Mouse Trap Note Holder


Hi, everyone!
Hope all is well. I can`t wait for spring! I am tired of winter, we have had a very cold winter, more cold than snow around here. But this weather does seem to give me more time for crafting so that is a plus.

This week I decided to do a little something I saw on pinterest(again..I am addicted to pinterest). I had Bill buy me some mouse traps he also bought a rat trap. At first he couldn't understand why I needed mouse traps when we already had some (used of course)

So anyway this is what I did. First remove the parts of the trap as I have done in the picture below. Now the real fun begins.


  • I took some scrap book paper and cut it to size. Actually I cut it into two pieces so I could fit it around the parts of trap that are still intact.
  •  I then used my trusty mod podge (I just couldn't do much without it, have I told you how much I love mod podge) to glue it to the mousetrap.
  •  Let it dry for awhile.
  •  I then took a piece of sandpaper and sanded the edges so there was no paper around the edges.
  •  OK take your mod podge and coat it, let dry and coat it again.
  •  I then bought some cheap fake flowers and used my glue gun (another tool I can't live without) and glued my flowers on.
  •  I also put a few drops of hot glue in the corner just to add a little something something.
  • Then I added a couple magnet strips on the back


And there you have it! A cute, quick and cheap little note holder.

Oh craft Saturday how I love thee!